Why Make Sourdough Sandwich Bread
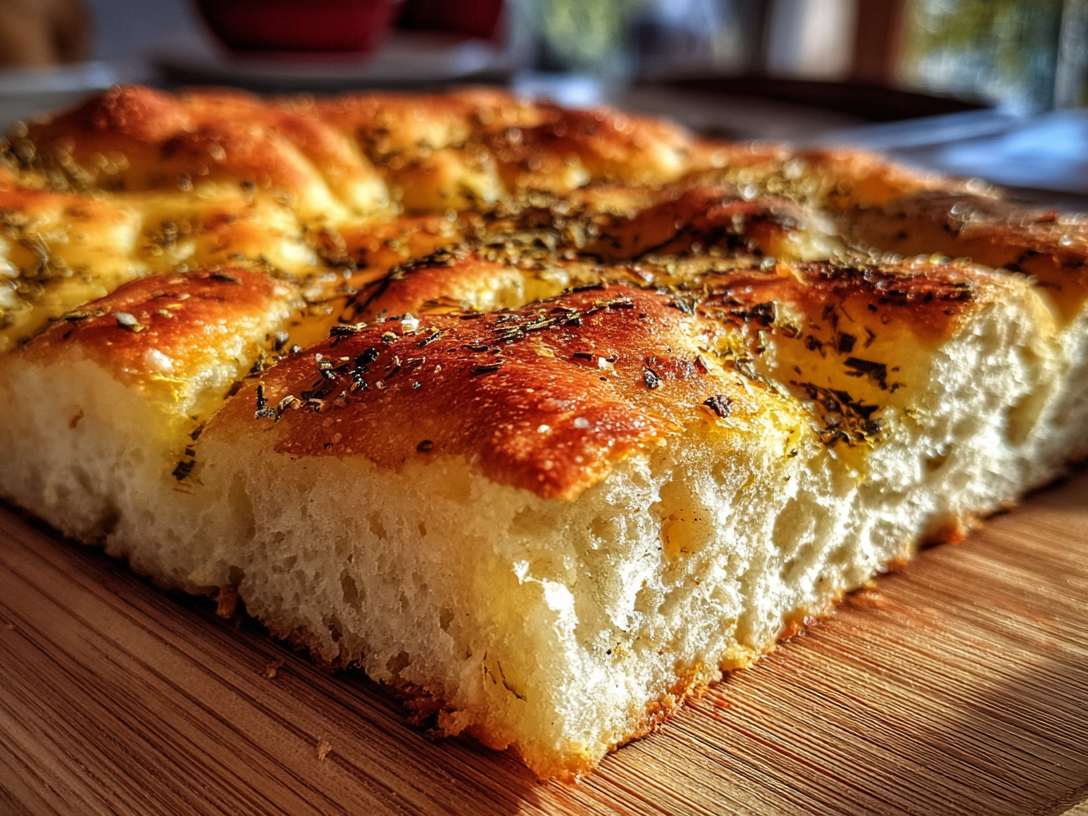
Few things are more comforting than the aroma of freshly baked sourdough sandwich bread — golden, crispy, and full of flavor. Unlike store-bought loaves, homemade sourdough has a naturally tangy taste and a soft crumb that makes every bite satisfying.
This recipe is perfect for anyone who loves real bread made the traditional way, using a natural recipe with sourdough starter instead of commercial yeast. The result? A loaf that’s rich in flavor, beautifully golden on the outside, and tender on the inside — ideal for everything from toast to a hearty sourdough breakfast sandwich.
Homemade sourdough is also more digestible and keeps longer than regular bread. Plus, baking it yourself gives you control over the ingredients, texture, and style — you can even get creative with sourdough bread designs or cheesy variations.
How to Make Golden & Crispy Sourdough Sandwich Bread
Making this easy sourdough bread recipe is simple once you understand the process. The secret to success lies in an active starter, proper kneading, and giving your dough enough time to rise. Even if you’re new to sourdough, this step-by-step method is foolproof and beginner-friendly.
This loaf is also a same-day sourdough recipe, meaning you can mix it in the morning and enjoy it by dinner. The key is to start early and let the natural fermentation process work its magic.
Ingredients
To make one loaf of golden and crispy sourdough sandwich bread, you’ll need:
- 1 cup (240g) active sourdough starter (fed and bubbly)
- 1 ½ cups (360ml) warm water
- 4 cups (480g) bread flour
- 2 tbsp sugar or honey (for a touch of sweetness)
- 2 tbsp unsalted butter or olive oil
- 1 ½ tsp salt
Optional Add-ins:
- ½ cup shredded cheese for sourdough cheese bread
- 1 tbsp dried herbs or seeds for flavor and texture
Directions
- Activate Your Starter: Feed your starter 4–6 hours before baking. It should be bubbly and doubled in size.
- Mix the Dough: Combine warm water, sugar, and sourdough starter in a large bowl. Add flour and salt, then mix until a rough dough forms.
- Knead the Dough: Knead by hand for 8–10 minutes (or use a stand mixer) until smooth and elastic. Add butter or olive oil during kneading for a soft, tender crumb.
- First Rise (Bulk Fermentation): Place the dough in a greased bowl, cover with a towel, and let it rise for 3–4 hours. Fold it once halfway through to strengthen the dough.
- Shape the Loaf: Gently deflate and shape the dough into a loaf. Place it in a greased pan or divide into smaller sourdough sandwich rolls.
- Second Rise: Let it proof again for 1–2 hours, until the dough rises above the rim of the pan.
- Bake: Preheat oven to 375°F (190°C). Bake for 35–40 minutes until the crust is golden and crispy. The bread should sound hollow when tapped on the bottom.
- Cool Completely: Let the loaf rest on a wire rack before slicing — this ensures the crumb sets and the crust stays crisp.
How to Serve
This golden & crispy sourdough sandwich bread is incredibly versatile. Use it for everyday sourdough sandwich recipes, from simple ham-and-cheese melts to gourmet avocado toasts. It’s also fantastic for breakfast — toast a slice, spread some butter or jam, or turn it into a sourdough breakfast sandwich with eggs and cheese.
You can also enjoy it as a side with soups, stews, or salads. Its slightly tangy flavor complements both sweet and savory toppings beautifully.
Tips for a Perfect Golden Crust
- Preheat your oven properly: A hot oven ensures a crisp golden crust.
- Use steam: Place a pan of hot water in the oven for the first 10 minutes to get that classic bakery-style crunch.
- Brush with butter: For a softer, shiny crust, brush the top of the loaf with melted butter right after baking.
- Experiment: Add shredded cheese or herbs for flavorful twists and try fun sourdough bread designs for artisan appeal.
FAQs
Q: Can I make this sourdough bread on the same day?
Yes! This is one of the best same-day sourdough recipes — mix, proof, and bake all within a single day.
Q: How can I make my crust more golden and crispy?
Bake on the middle rack with good airflow, and don’t underbake — the crust should turn deep golden brown.
Q: How should I store sourdough sandwich bread?
Keep it in a bread bag or wrap it in a towel at room temperature for up to 3 days. You can also slice and freeze it for longer storage.
Final Thoughts
This golden & crispy sourdough sandwich bread is everything homemade bread should be — flavorful, simple, and satisfying. It’s a staple you’ll want to bake again and again. From soft sandwich loaves to mini sourdough sandwich rolls, every version of this recipe celebrates the art of sourdough baking.
Whether you’re making it for family breakfasts or layering it into hearty lunch sandwiches, this bread adds warmth and authenticity to your table. Start your own sourdough tradition today — your kitchen will never smell the same again.
Golden & Crispy Sourdough Sandwich Bread
Ingredients
Method
- Activate the Starter: Feed your sourdough starter 4–6 hours before baking until it doubles in size and looks bubbly.
- Mix the Dough: In a large mixing bowl, combine starter, warm water, and sugar or honey. Add flour and salt, stirring until a sticky dough forms.
- Knead: Knead for 8–10 minutes by hand or mixer until smooth and elastic. Add butter or oil during kneading for a soft crumb.
- First Rise: Place dough in a greased bowl, cover, and let rise for 3–4 hours at room temperature. Fold once halfway through.
- Shape: Gently deflate the dough, shape into a loaf, and place in a greased loaf pan. For mini versions, divide into rolls.
- Second Rise: Cover and let rise for 1–2 hours, or until dough doubles in size.
- Bake: Preheat oven to 375°F (190°C). Bake for 35–40 minutes, or until golden and crispy.
- Cool: Transfer to a wire rack and cool completely before slicing to maintain texture.
- If your kitchen is cool, extend proofing time slightly for a better rise.
- For a tangier flavor, refrigerate the dough overnight before baking.
- This bread is naturally leavened — easier to digest and packed with nutrients.
Notes
- If your kitchen is cool, extend proofing time slightly for a better rise.
- For a tangier flavor, refrigerate the dough overnight before baking.
- This bread is naturally leavened — easier to digest and packed with nutrients.