Introduction
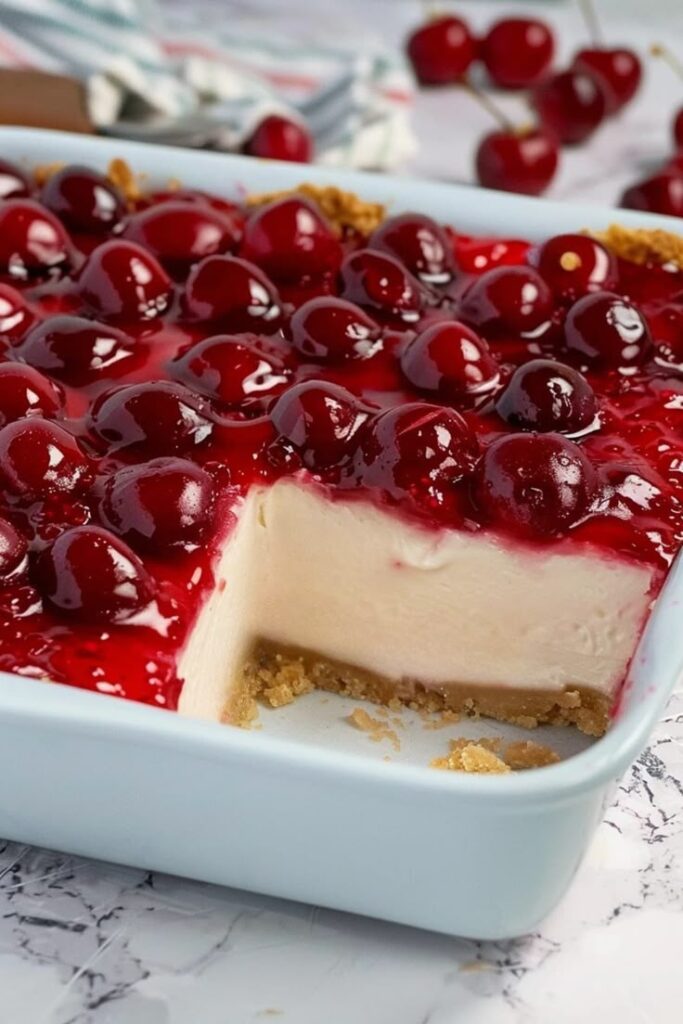
Cherry desserts have long been a comforting, classic staple on tables around the world, from holiday buffets to backyard barbecues. Among the easiest and most loved is the No-Bake Cherry Dessert. This cool and creamy dish is as indulgent as it is simple, offering a layered combination of buttery graham cracker crust, smooth cream cheese filling, and luscious cherry pie topping.
Perfect for both beginner and experienced home cooks, this dessert requires no oven time, making it a go-to treat when you want something delicious without the heat. With its vibrant red topping and creamy center, it’s as pretty as it is tasty—and it’s incredibly versatile, allowing for substitutions based on diet or preference.
Whether you’re feeding a crowd or just craving something sweet and nostalgic, this no-bake cherry dessert is the solution. Let’s dive into everything you need to know to make it flawless!
Recommended Kitchen Tools
To make this recipe efficient and mess-free, gather the following tools before starting:
- 9×13-inch baking dish or glass pan
- Mixing bowls (one large, one medium)
- Hand mixer or stand mixer
- Silicone spatula or large spoon
- Measuring cups and spoons
- Plastic wrap or foil (for chilling)
Ingredients
Here’s what you’ll need to create the perfect no-bake cherry dessert:
For the crust:
- 2 cups graham cracker crumbs
- ½ cup unsalted butter, melted
- 2 tablespoons granulated sugar (optional)
For the cream cheese layer:
- 2 packages (8 oz each) cream cheese, softened
- 1 cup powdered sugar
- 1 teaspoon vanilla extract
- 1 tub (8 oz) whipped topping (Cool Whip), thawed
For the topping:
- 1 can (21 oz) cherry pie filling
- Optional: fresh cherries for garnish or a drizzle of chocolate sauce
Preparation
Step 1: Prepare the Crust
In a mixing bowl, combine graham cracker crumbs, melted butter, and optional sugar. Stir until the mixture resembles wet sand.
Press the crust firmly into the bottom of a 9×13-inch dish to create an even layer. Use the bottom of a measuring cup to compact the crust. Place the dish in the refrigerator to chill while preparing the filling.
Step 2: Make the Cream Cheese Filling
In a large bowl, beat the softened cream cheese with a hand mixer until smooth and fluffy. Add powdered sugar and vanilla extract. Beat again until well combined.
Gently fold in the whipped topping using a spatula. Be careful not to deflate the mixture—you want it to remain light and airy.
Step 3: Assemble the Layers
Remove the chilled crust from the fridge and spread the cream cheese mixture evenly over it. Use a spatula to smooth the top.
Carefully spoon the cherry pie filling over the cream layer, spreading it gently to cover the entire dessert.
Step 4: Chill and Serve
Cover the dish with plastic wrap or foil and refrigerate for at least 4 hours or overnight. This allows the layers to firm up and meld flavors.
When ready to serve, slice into squares and garnish with fresh cherries or an extra dollop of whipped cream if desired.
Tips for Success
- Use full-fat cream cheese for the richest and most stable filling.
- Soften the cream cheese at room temperature for at least 30 minutes before beating to avoid lumps.
- Chill thoroughly before serving to help the layers set nicely.
- Double the recipe if serving a large crowd—it disappears quickly!
- Try a springform pan for a more elegant, cake-like presentation.
Recipe Variations
This dessert is incredibly versatile. Try some of these tasty twists:
🍫 Chocolate Cherry Version
Add ¼ cup cocoa powder to the graham cracker crust or drizzle the top with chocolate syrup. You can also use chocolate graham crackers for extra depth.
🫐 Berry Medley Topping
Substitute the cherry pie filling with blueberry, raspberry, or a mixed berry topping.
🍋 Lemon Cherry Cream
Add 2 tablespoons of lemon juice and zest to the cream cheese mixture for a citrusy boost that pairs beautifully with cherries.
🍰 Cheesecake Style
Make a double-thick crust and press it into the sides as well as the bottom of a springform pan. Chill and slice like a cheesecake.
Make It Fit Your Diet
🌱 Vegetarian & Nut-Free
This recipe is naturally vegetarian and nut-free—just make sure to use certified nut-free pie fillings if you have allergies in the household.
🍃 Gluten-Free
Substitute regular graham crackers with gluten-free ones. Ensure other ingredients like pie filling and whipped topping are certified gluten-free.
🥥 Dairy-Free
Use dairy-free cream cheese, a plant-based whipped topping, and vegan butter for the crust. Many coconut-based options work well and taste delicious.
🍬 Low Sugar / Keto
Use sugar-free graham crackers, keto-approved sweeteners (like erythritol), and sugar-free pie filling. You can also make your own cherry topping using fresh cherries and a sugar substitute.
FAQs (Frequently Asked Questions)
Q: Can I make this dessert ahead of time?
A: Yes! This dessert is perfect for making ahead. It actually tastes better when it sits overnight in the fridge.
Q: How long does it last in the fridge?
A: Properly covered, it can last 4–5 days in the refrigerator. The crust may soften slightly over time, but the flavor remains delicious.
Q: Can I freeze this dessert?
A: You can freeze it, but the texture of the cream cheese layer may change slightly. If freezing, do so before adding the cherry topping and wrap it tightly. Thaw in the fridge and top just before serving.
Q: Can I use homemade cherry topping?
A: Absolutely! Simmer fresh or frozen cherries with a bit of sugar, cornstarch, and lemon juice until thickened for a delicious homemade touch.
Q: Can I make this in individual cups?
A: Yes, layering it in small jars or dessert cups makes adorable individual servings—perfect for parties or picnics.
Conclusion
This No-Bake Cherry Dessert is the ultimate sweet treat for those who love simplicity and indulgence. With its buttery graham cracker base, luscious cream cheese filling, and bright cherry topping, it’s a showstopper at any event without requiring an oven.
Whether you’re hosting a holiday dinner, bringing dessert to a potluck, or just satisfying a cherry craving on a warm day, this recipe is foolproof and delicious. Plus, with its endless variations and dietary flexibility, it’s a dessert everyone can enjoy.