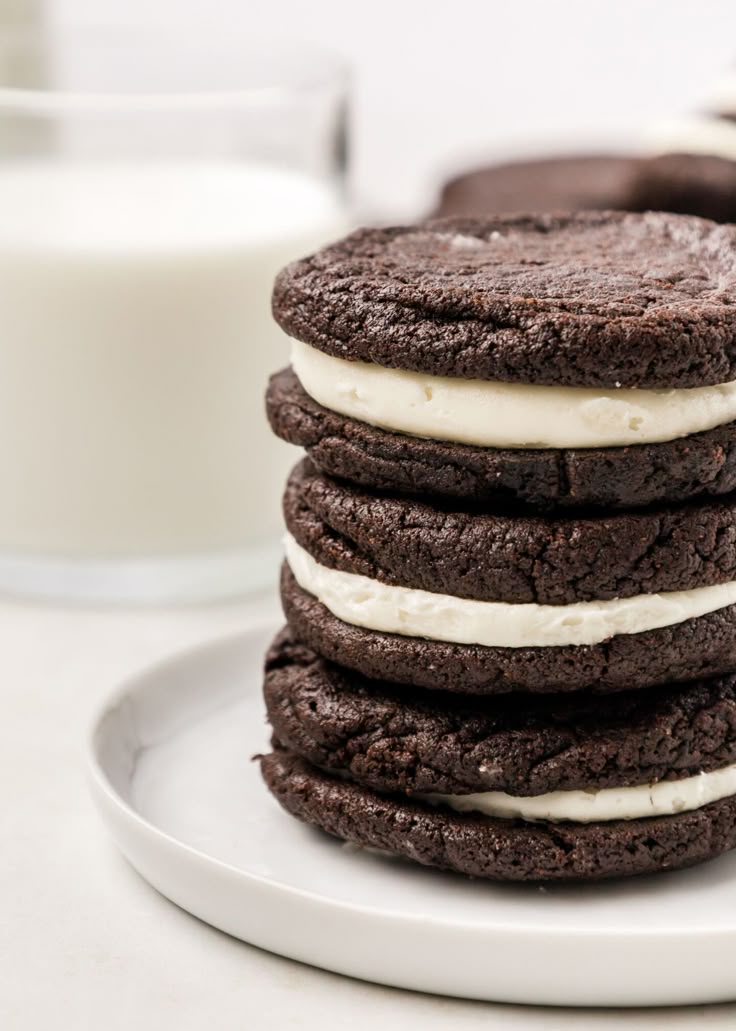
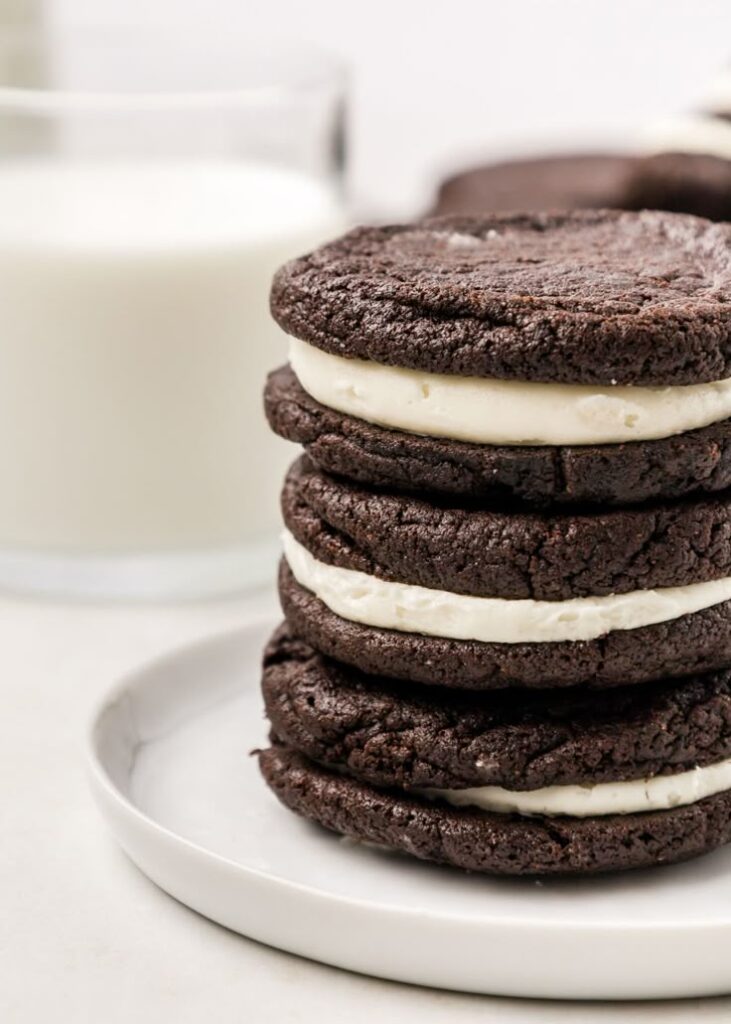
There’s nothing quite like the nostalgic joy of biting into an Oreo — that classic combination of two dark chocolate cookies sandwiching a sweet vanilla cream is a worldwide favorite. But what if you could make an even better version right in your own kitchen? Homemade Oreos are the perfect blend of rich, cocoa-filled cookies and creamy vanilla frosting — made with real ingredients, no preservatives, and completely customizable to your taste.
Whether you enjoy them with a cold glass of milk, crumble them into your favorite dessert, or give them as gifts, homemade Oreos offer a more flavorful and satisfying version of the original store-bought classic. They’re fun to bake, easy to assemble, and impressive enough to serve at parties or bake sales.
Recommended Kitchen Tools
Making homemade Oreos doesn’t require advanced baking equipment, but having a few essential tools on hand will help ensure a smooth, enjoyable baking process:
- Electric Mixer (hand or stand) – For creaming butter, sugar, and making the filling.
- Mixing Bowls – One for the cookie dough and another for the cream filling.
- Measuring Cups and Spoons – To measure ingredients accurately.
- Whisk or Spatula – Useful for combining dry ingredients and scraping down bowls.
- Rolling Pin – For rolling out the cookie dough evenly.
- Round Cookie Cutter (2-inch) – To cut uniform cookie shapes.
- Baking Sheet(s) – Lined with parchment paper for easy cleanup.
- Wire Rack – For cooling the cookies evenly.
- Piping Bag (optional) – For neatly applying the filling between cookies.
These basic tools will help you bake and assemble the cookies quickly and consistently.
Ingredients
This recipe makes about 20–24 sandwich cookies depending on the size of your cutter.
For the Chocolate Cookies:
- 1 cup (226 g) unsalted butter, softened
- 1 cup (200 g) granulated sugar
- 1 large egg
- 1 teaspoon vanilla extract
- 1 ¼ cups (155 g) all-purpose flour
- ¾ cup (65 g) Dutch-process cocoa powder
- ½ teaspoon baking soda
- ½ teaspoon salt
For the Cream Filling:
- ½ cup (113 g) unsalted butter, softened
- 2 cups (240 g) powdered sugar
- 1 teaspoon vanilla extract
- 1 tablespoon milk or heavy cream (adjust for consistency)
Optional: Add a pinch of salt to the filling for balance, or use flavor extracts like peppermint or almond for variations.
Preparation
1. Make the Cookie Dough
In a large mixing bowl, cream the butter and sugar together using a mixer until light and fluffy (about 2–3 minutes). Add the egg and vanilla extract and continue beating until fully incorporated.
In a separate bowl, whisk together the flour, cocoa powder, baking soda, and salt. Gradually add the dry ingredients to the butter mixture. Beat until a soft but not sticky dough forms. If the dough is too soft, refrigerate it for 15–20 minutes.
2. Roll and Cut
Preheat your oven to 350°F (175°C). On a lightly floured surface or between two sheets of parchment, roll the dough to about ¼-inch thickness. Use a round cutter (around 2 inches) to cut out the cookies. Reroll scraps as needed.
Place cookies on parchment-lined baking sheets, spacing about 1 inch apart.
3. Bake the Cookies
Bake for 8–10 minutes, or until the edges are firm and the centers are set. The cookies will continue to firm up as they cool. Let them cool on the baking sheet for 5 minutes, then transfer to a wire rack to cool completely.
4. Make the Filling
While the cookies are cooling, prepare the filling. In a clean bowl, beat the softened butter until smooth. Add the powdered sugar gradually, then beat in the vanilla and milk. Continue mixing until fluffy and spreadable. Add a touch more milk if needed to loosen, or more sugar to thicken.
5. Assemble the Sandwich Cookies
Pair up the cooled cookies by size. Using a piping bag or a small spoon, place about 1–2 teaspoons of filling on the flat side of one cookie. Top with another cookie and press gently to spread the filling evenly. Repeat with the remaining cookies.
Allow the cookies to set at room temperature or refrigerate for a firmer filling before serving.
FAQ
Can I use natural cocoa powder instead of Dutch-process?
You can, but Dutch-process cocoa gives the cookies a richer, darker color and a smoother chocolate flavor. Natural cocoa will make the cookies slightly more bitter and lighter in color.
Can I make the dough ahead of time?
Yes. The dough can be wrapped tightly in plastic and refrigerated for up to 3 days, or frozen for up to 2 months. Let it thaw in the fridge before rolling.
How do I store the finished Oreos?
Store in an airtight container at room temperature for up to 4 days, or refrigerate for up to 1 week. They also freeze well — just wrap them individually or layer between parchment in a container.
Can I use different flavors for the filling?
Absolutely. Add a drop of peppermint extract, orange zest, or peanut butter to the cream filling to create your own custom Oreo flavor.
Can I make gluten-free Oreos?
Yes. Simply substitute your favorite gluten-free all-purpose flour blend. Make sure to chill the dough longer, as gluten-free doughs tend to be softer.
Conclusion
Homemade Oreos are a delightful way to enjoy the iconic sandwich cookie in a new, more indulgent way. Crisp, chocolaty, and perfectly balanced with a rich vanilla cream filling, these cookies are ideal for everything from lunchbox treats to holiday dessert trays.
Beyond their incredible flavor, the real joy lies in the experience — mixing, cutting, baking, and assembling a cookie that’s familiar yet uniquely yours. Whether you enjoy them straight from the cookie jar or twist them apart the classic way, homemade Oreos are guaranteed to become a repeat favorite in your baking routine.