
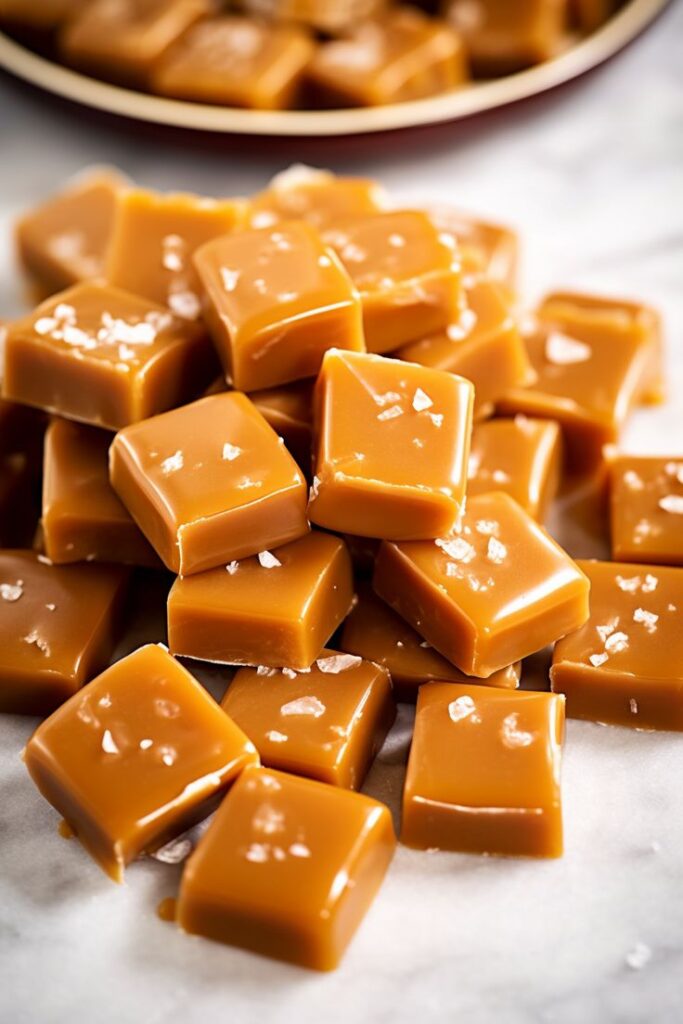
There’s something magical about homemade caramels — those golden, buttery squares that melt slowly on the tongue with the perfect balance of sweetness, creaminess, and a touch of salt. Unlike the hard, sticky store-bought versions, super soft homemade caramels have a velvety texture and a melt-in-your-mouth quality that makes them absolutely irresistible.
Whether you’re preparing holiday treats, DIY edible gifts, or just indulging your sweet tooth, making caramels from scratch is easier than you might think. With a handful of pantry staples and a bit of attention to temperature, you can create a batch of smooth, chewy caramels that rival any candy shop.
This recipe focuses on achieving the ultimate soft caramel texture — firm enough to hold its shape, yet yielding and buttery when you bite into it. Perfect for wrapping in wax paper, dipping in chocolate, or enjoying as-is. Once you make these, you’ll never go back to the packaged kind again.
Recommended Kitchen Tools
Precision and timing are essential when making candy, and having the right tools makes the job much smoother. Here are the tools recommended for crafting super soft homemade caramels:
- Heavy-Bottomed Saucepan (3–4 quart) – Ensures even heating and prevents burning.
- Candy Thermometer or Digital Instant-Read Thermometer – Crucial for hitting the right temperature.
- Silicone Spatula or Wooden Spoon – For consistent stirring without scratching the pan.
- Measuring Cups and Spoons – Accuracy is key.
- Pastry Brush – To prevent sugar crystals from forming on the sides of the pan.
- 9×9-inch Baking Dish – Lined with parchment paper for easy caramel removal.
- Parchment Paper or Wax Paper – For lining and wrapping individual caramels.
- Sharp Knife or Kitchen Scissors – To cut the caramels cleanly.
With these tools, you’ll feel like a professional confectioner in your own kitchen.
Ingredients
This recipe uses simple, accessible ingredients to deliver caramels that are rich, creamy, and perfectly soft. Yield: about 60 bite-size caramels.
Main Ingredients:
- 1 cup (2 sticks / 226 g) unsalted butter
- 2 1/4 cups (450 g) packed light brown sugar
- 1 cup (240 ml) light corn syrup
- 1/8 teaspoon salt
- 1 (14 oz / 396 g) can sweetened condensed milk
- 1 teaspoon vanilla extract
Optional Add-Ins & Toppings:
- Flaky sea salt (for salted caramels)
- Melted chocolate (for dipping)
- Chopped nuts (e.g., pecans, almonds)
- Espresso powder (for a mocha twist)
- Bourbon or maple extract (for flavor variations)
These ingredients blend to form a buttery, rich candy with perfect chew and sweet notes of toasted sugar and cream.
Preparation
Step 1: Prep the Pan
Line a 9×9-inch baking dish with parchment paper, leaving some overhang for easy lifting. Lightly grease the paper with butter or non-stick spray. Set aside.
Step 2: Melt the Butter and Sugar
In a heavy-bottomed saucepan, combine butter, brown sugar, corn syrup, and salt. Cook over medium heat, stirring constantly, until the butter melts and the mixture begins to bubble.
Step 3: Add Sweetened Condensed Milk
Once the sugar mixture is fully melted and bubbling, slowly stir in the sweetened condensed milk. Reduce heat slightly to medium-low and continue cooking while stirring constantly. This step is crucial to avoid burning.
Step 4: Cook to Temperature
Attach a candy thermometer to the side of the pot (or use a digital thermometer to check frequently). Cook the caramel mixture until it reaches 238°F (114°C) for super soft caramels. For slightly firmer caramels, go up to 242°F (117°C).
Stir constantly and scrape the bottom and sides as it thickens and darkens to a rich golden brown. This can take 10–15 minutes.
Pro Tip: If sugar crystals form on the pan sides, dip a pastry brush in water and brush them down to prevent grainy texture.
Step 5: Add Vanilla and Pour
Once you’ve hit the right temperature, remove the pot from heat and stir in vanilla extract (and any optional flavorings). Carefully pour the hot caramel into the prepared baking dish. Gently tap the pan on the counter to remove any air bubbles.
Optional: Sprinkle with flaky sea salt while warm for a salted caramel finish.
Let the caramels cool at room temperature for 3–4 hours or until fully set.
Step 6: Cut and Wrap
Once firm, lift the caramel slab out of the pan using the parchment paper. Use a sharp, greased knife or kitchen scissors to cut into bite-size squares.
Wrap each piece in wax or parchment paper to prevent sticking and store in an airtight container.
FAQ
Can I use dark brown sugar instead of light?
Yes, but it will yield a deeper, more molasses-forward flavor and darker color. Both are delicious, but light brown sugar creates a classic caramel taste.
Why do I need a thermometer?
Candy making is sensitive to temperature. Hitting 238°F–242°F ensures the right texture: too low and it won’t set; too high and it’ll be too hard.
My caramels turned out too soft/sticky — what happened?
They likely didn’t reach the right temperature. Next time, cook them 2–3 degrees higher. Also ensure they’re fully cooled before cutting.
Can I double the recipe?
Yes, but use a larger saucepan and pan (like 9×13-inch), and be cautious about stirring continuously and cooking a little longer.
Do caramels need to be refrigerated?
No — they keep best at room temperature in an airtight container for up to 2 weeks. If you refrigerate them, they’ll firm up and may lose some softness.
Can I dip them in chocolate?
Absolutely! Chill the cut caramels first, then dip in melted chocolate and let set on parchment. You can also top with nuts or sea salt before the chocolate hardens.
Conclusion
Super Soft Homemade Caramels are more than just candy — they’re little squares of happiness that melt on your tongue and bring a smile with every bite. With just a few basic ingredients and some patience at the stove, you can create a treat that’s far superior to anything you’ll find in a wrapper.
These caramels are perfect for gifting, celebrating, or just stashing in your pantry for when that sweet craving strikes. They’re also endlessly customizable — make them salted, dip them in chocolate, swirl in espresso, or roll them in nuts. No matter how you spin it, this is a recipe that delivers rich, buttery satisfaction every time.

I know an easier way..take a can of sweetened condensed milk and cover it with water(in a saucepan) and boil low for 1 hr And you will have the best Carmel